Last year, my son wanted Minecraft cake decorations for his birthday cake. So we bought a Minecraft themed cake from the store. It was pretty, but it tasted like it was, well, from the store. And it was expensive. This year, for his birthday, he wanted – you guessed it – a Minecraft cake again. So I decided to make one myself.
The Research Into the World of Minecraft Cake Decorations
I researched online and found lots of different options, but most of them looked way too complicated for what I had time to accomplish. I wanted something simple. One cake created a Minecraft hillside, complete with grass and a blue gelatin stream running down it. Another one I found looked like the chef spent 3 hours on the fondant icing to make all the little Minecraft squares. I needed something simpler, so I decided to improvise and create my own.
The Simple Cake
To keep it simple, I used a lot of pre-made ingredients in this cake. It has store bought cake mix, and store bought icing, and store bought decorations. But the assembly made it personal, and interesting, and got me a “mom, we should do this cake every year” from my son, so it was perfect. Plus, not including baking time, it probably only took me about 15 minutes total to pull this together.
As an Amazon Associate I earn from qualifying purchases. The opinions here are all my own and I take pride in only recommending items I would use myself. I am not sponsored for any of these products, and I purchased them with my own money. If you are interested in learning more about the products, please use my links, as it will not cost you any more, but will help support my blog. Thank you!
Instructions
Step 1 – Make the Cake.
Get a boxed cake mix (any kind your kid likes) and follow the directions. Make the cake in a square or rectangle pan to make the next steps easier (circles don’t work well). Let the cake cool before frosting.
Step 2 – Mix the Icing.
You will need four colors of icing. Mix the icing colors as noted below.
- Chocolate Icing – use for Dark Brown squares
- White or Vanilla Icing – Mix in food coloring using the ratios below (scale as needed depending on how much icing you are making)
- Light Brown – 1 drop yellow, 1 drop blue, 1 drop red (keep the ratios equal)
- Dark Green – 6 parts green, 2 parts red, 1 part yellow
- Light Green – just green food coloring
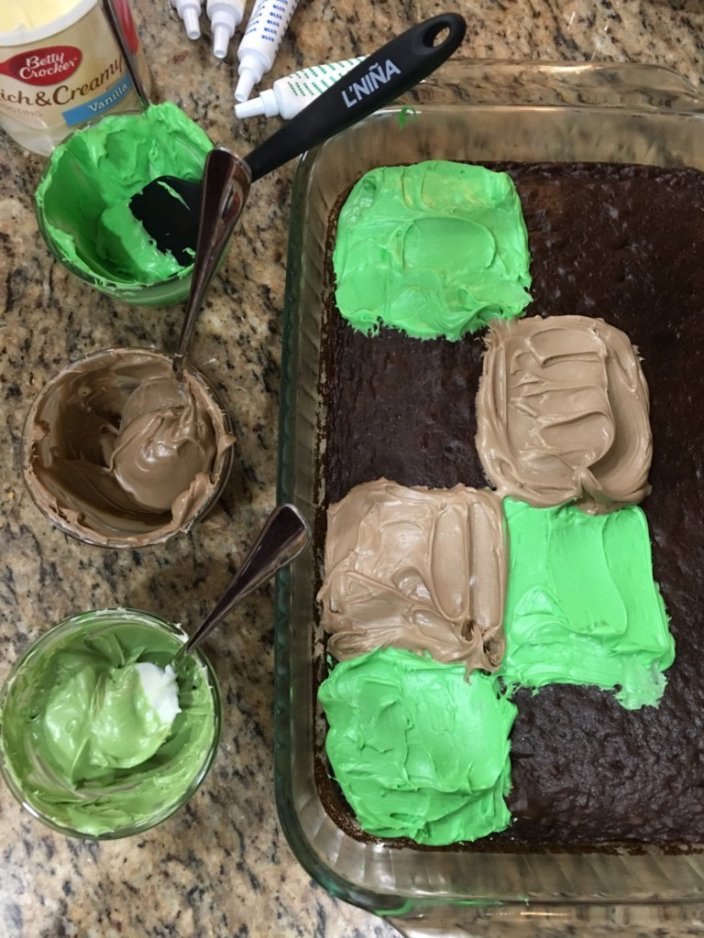
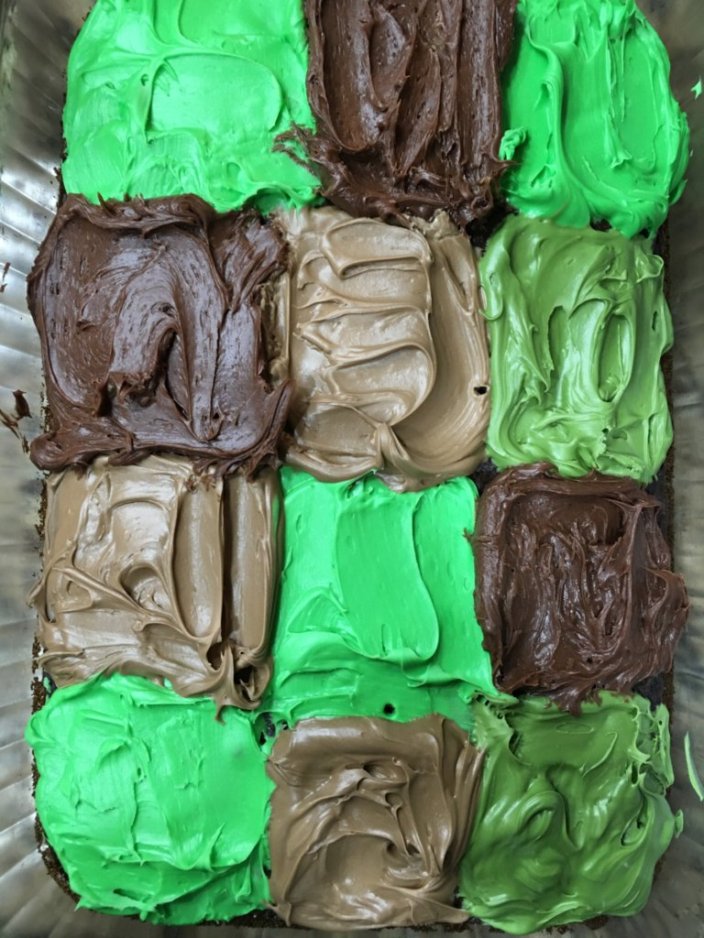
Step 3 – Paint the squares on the cake.
Mentally divide the cake into a grid of squares. Then paint the squares with the frosting. The trick is to keep the colors random, but plan ahead enough to ensure you don’t have a color right next to itself. To help with spreading the icing, I used this spatula which I love, but you could also use the back of a spoon.
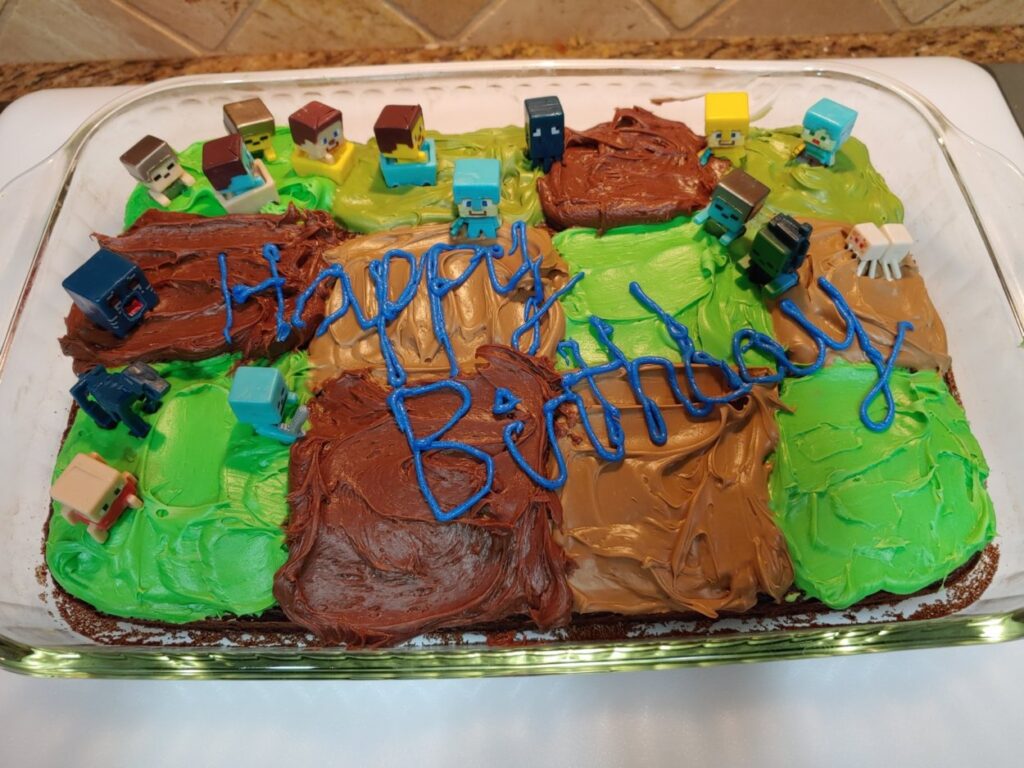
Step 4 – Add writing and Minecraft cake decoration figures.
If you want writing on it, you can use one of the pre-made tubes of frosting that’s made for writing. The blue color shows up well on the green and brown frosting. You should also add the little Minecraft cake decorations here to give it some extra flair. Plus, once the cake is gone, simple wash them off and the kids have little toys that they love as well.
Conclusion
In my opinion, when making a birthday cake, all you really need is a little bit of creativity, a small amount of money, and a lot of love. If you add those things together, the cake comes out perfect every time. I’d love to hear about how your Minecraft cake turned out for your special little person in your life.